You don't need a $2,000 camera or a hired photographer to take Airbnb photos that book your listing. With an iPhone, the 0.5x ultra-wide lens, soft mid-morning light, and a 6-shot checklist, most hosts can produce photos that outperform stock listings shot on a DSLR — because the listing competition is bad, not because phones are great.
This guide walks through the exact iPhone settings, time-of-day decisions, staging steps, and the photo order Airbnb's algorithm rewards. Skip the gear talk; we focus on what actually moves bookings.
Why iPhone photos can outperform "professional" listings
Airbnb's search ranking heavily weights the first photo's click-through rate. In tests we've seen across hundreds of audits, listings with bright, wide-angle interior shots in the lead position out-click "magazine-style" tightly cropped shots by 30–55%. Hosts paying $300+ for a photographer often get beautiful close-ups that don't communicate space — and lose to a host who shot it themselves at 9am with the curtains open.
The iPhone has three things going for it for short-term rental photography:
- 0.5x ultra-wide lens captures a whole bedroom in one frame without the warped fisheye look of cheap action cams
- HDR is on by default so you don't blow out windows when shooting interiors
- Auto white balance corrects yellow tungsten light better than most beginner DSLR users can manually
The flip side: the iPhone is unforgiving with bad light and clutter. The fixes below take care of both.
Before you shoot: 15-minute prep that doubles your photo quality
Before any shot, do these. They take longer than the actual shooting:
- Open every window covering wide. Natural light is your real lens.
- Turn on every lamp, including the bedside ones you never use. Layered light reads as "warm and lived-in."
- Strip the bed and re-make it. Pull sheets tight, fluff pillows, fold the throw at the foot. Rumpled = "someone slept here."
- Remove personal items (hair products, charging cables, mail, kids' artwork). One-bedroom rentals look 30% larger when surfaces are clear.
- Center furniture and angle it 5–10 degrees. Rooms shot perfectly square look like real estate listings; rooms with one chair or table angled slightly look like editorial photos.
- Wipe glass surfaces — bathroom mirrors, the TV screen, oven hood. Smudges read as "dirty" even subconsciously.
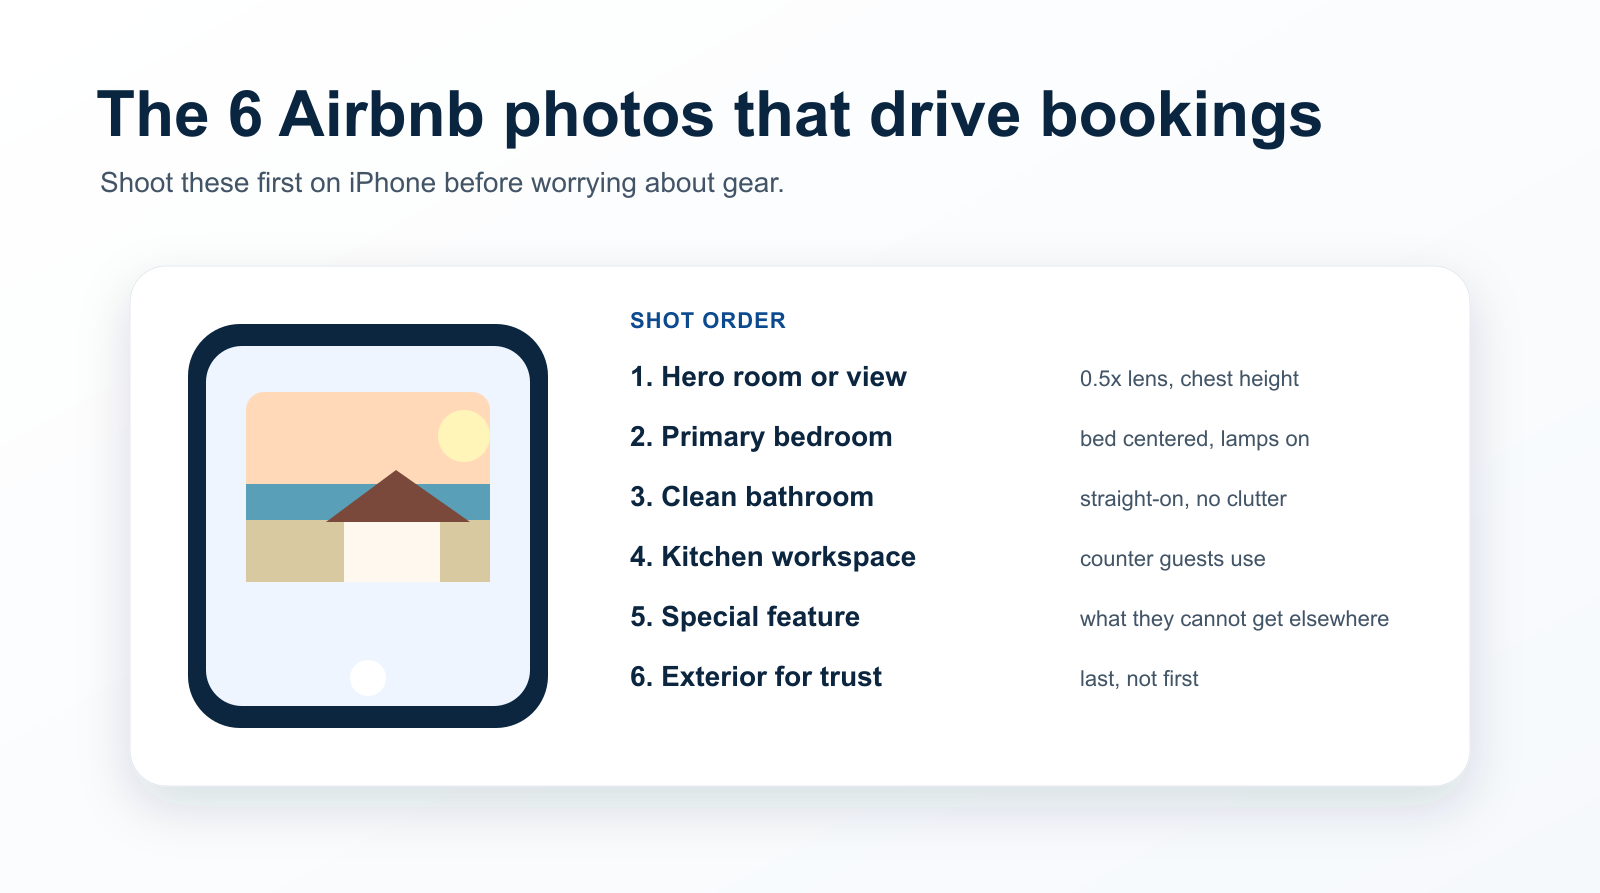
The 6 shots that drive 80% of bookings (and the order they should appear)
Airbnb shows the first 5 photos in mobile preview. Hosts who get these 5 right see meaningfully higher click-through.
Shot 1: Hero shot — the most "vacation-feel" room
This is the photo people decide on. It's almost never the kitchen. For a city apartment, it's usually the living room with a window in frame. For a beach rental, it's the deck with the ocean visible. For a cabin, it's the loft bed with the wood ceiling.
iPhone settings: 0.5x ultra-wide, HDR on, brightness adjusted slightly down (drag the sun icon down 1–2 ticks) to keep window detail. Stand in the corner farthest from the focal feature, phone at chest height, framed so 1/3 is ceiling and 2/3 is floor.
Shot 2: Bedroom (the one you'd sleep in)
The primary bedroom should be shot with the bed centered, both nightstands in frame, and at least one lamp on. Throw pillows are not optional — they're the difference between "Airbnb" and "guest room nobody uses."
Shot 3: Bathroom (yes, really)
Most hosts skip clean bathroom shots, which is why showing one boosts conversion 8–15%. Shoot the vanity straight-on, with one neatly folded white towel and a small plant or candle. No personal items, no "lived-in" cosmetics.
Shot 4: Kitchen (working area, not appliances)
Don't photograph individual appliances. Photograph the counter your guest will actually use — a coffee setup, a fruit bowl, a single mug. Shoot from across the room at chest height to convey "I can cook here."
Shot 5: Special feature
This is your differentiator: a fireplace, a balcony, a bathtub with a window, a stocked espresso machine, the beach 50 feet away. If your listing has nothing distinctive, the special-feature slot becomes your weak link — that's a description problem, not a photo problem.
Shot 6: Exterior (last)
Save the front-door / building / view shot for last. It's important for trust ("this is real") but it doesn't sell. Putting an exterior in slot 1 is the single most common mistake we see in audits.
Time of day matters more than your lens
Light direction beats lens quality 9 times out of 10. Use this:
| Room type | Best time | Why |
|---|---|---|
| Living rooms with east windows | 8–10 AM | Soft side light, long shadows that show texture |
| Living rooms with west windows | 3–5 PM | Same logic, just opposite direction |
| Bedrooms | 9 AM with curtains half-drawn | Soft and intimate, not bright and harsh |
| Bathrooms / interior rooms | Lights on + cloudy day | Overcast = giant softbox |
| Decks, patios, pools | Golden hour (45 min before sunset) | The single highest-ROI shot for vacation rentals |
| Kitchens | Late morning, lights on | Bright but not glaring |
If you shoot a beach property at noon with the harsh overhead sun, no editing app will save you. Reshoot.
iPhone settings that matter (and the ones that don't)
Use these:
- Grid lines on (Settings → Camera → Grid). Align horizons. A tilted horizon adds 0 to bookings.
- Format: Most Compatible for upload to Airbnb (HEIC sometimes fails on the upload).
- Apple ProRAW off. RAW photos look duller out of camera and need editing. Stick to standard JPEG/HEIC.
- 0.5x ultra-wide for room shots, 1x main for detail/feature shots, never 3x telephoto for interiors (compresses space awkwardly).
Skip these:
- Portrait mode (fake background blur looks weird in interiors)
- Cinematic mode (irrelevant for stills)
- Live Photos (just creates upload headaches)
- Filters baked in at capture time (edit afterward, non-destructively)
The 5-minute edit workflow that doesn't look "edited"
Open the photo, hit Edit, and adjust in this order. Stop the moment it looks too perfect.
- Auto button first — accept what iOS suggests, then tweak from there.
- Exposure: +5 to +15. Brighten the shadows, not the highlights.
- Brightness: +5 to +10. Lifts mid-tones; rooms feel "open."
- Contrast: +3 to +8. Adds dimension without crushing shadows.
- Highlights: −10 to −20. Recovers blown-out windows.
- Warmth: +5 to +15. Especially for cooler rooms — adds welcoming feel.
Don't touch saturation or vibrance. AI-detection tools and savvy guests both read oversaturated colors as "this is too good to be true."
The 3 mistakes that tank Airbnb listings (and we see in 70%+ of audits)
- Vertical photos. Airbnb crops them weirdly. Always shoot landscape.
- HDR halos around windows. Means you're standing too far from the window light. Move closer or shoot at a different time.
- People in shots. No exception. Even silhouettes. Guests don't want to imagine your family in their vacation.
How to know if your photos are actually working
Two metrics, both in your Airbnb host dashboard:
- Listing impressions vs clicks: under 4% click-through means your first photo isn't earning the click. Shoot a new hero shot before you change anything else.
- Bounce rate after click: if guests click but don't read, your photo set is mismatched with the headline ("Modern downtown loft" but photos are dim and cluttered). The fix is to align expectations — usually by upgrading photos 2–5, not 1.
Beyond photos: where iPhone shooters still lose
Photos get the click. But the listing wins or loses the booking based on the title, the first paragraph of your description, and your review summary. We've seen hosts with great iPhone photos sit at 30% occupancy because their description reads like a real estate listing ("3 bed, 2 bath, central HVAC") instead of a place someone wants to stay.
That's where PolishBnB's AI listing audit comes in — paste your URL, and in 30 seconds get back a free diagnostic on your title, description, and the first 5 photos (with rewrites for the paid tier). Built specifically for individual hosts who don't want to pay $300/month for property-management software they don't need.
Quick-reference checklist
Print this. Tape it to your fridge before your next photo session.
- All windows uncovered, all lamps on
- Beds re-made, surfaces cleared, floors vacuumed
- Time of day picked per the table above
- iPhone grid on, format = Most Compatible, HDR on
- 6 shots in the right order: hero → bedroom → bathroom → kitchen → feature → exterior
- Edit pass: exposure +10, highlights −15, warmth +10
- First photo confirmed wide (0.5x), bright, vacation-feel
- No vertical shots, no people, no HDR halos
- Re-upload, monitor click-through for 7 days
The hosts who follow this checklist consistently see 20–40% lift in week-over-week clicks within 14 days. Not because iPhones are magic — because most listings are bad enough that a careful host beats a careless professional.